Illustrator
How to Create Gradient Text – Give Your Letters a Modern Color Blend
Want to learn how to create a modern gradient style around your text?
In this step-by-step tutorial, you’ll discover how to make an eye-catching gradient text effect in Adobe Illustrator (or Photoshop).
Whether you’re a beginner or just want to give your designs a fresh, contemporary look — this gradient technique will instantly make your typography stand out.
Final Result

From Idea to Final Result
Step 1: Type and Select Your Font
Open Adobe Illustrator and type the text you want to use.
Choose a font that matches the modern look you want to create — a clean sans-serif works perfectly.
Then, select your text using the Selection Tool (V).
Step 2: Make a Compound Shape
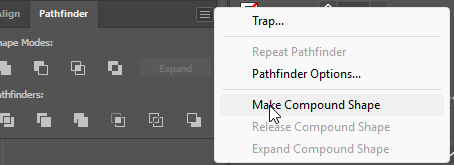
Go to Pathfinder → Make Compound Shape.
This ensures your text is treated as a single shape — helpful for the steps ahead.
Step 3: Open the Appearance Panel
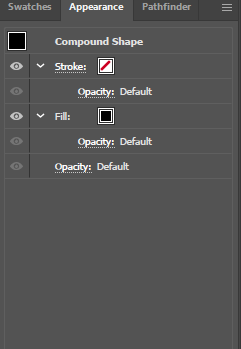
In the right sidebar, go to Window → Appearance.
This panel lets you add multiple fills and strokes to your text, giving you more creative control.
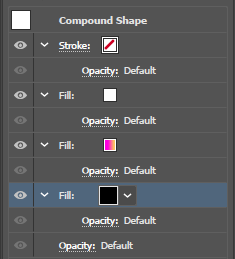
Step 4: Add a White Fill
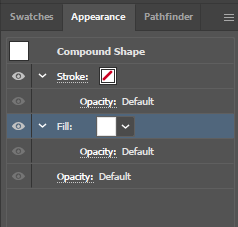
Click on the black fill and change the color to white.
This will serve as the base layer for your text.
Step 5: Duplicate the Fill and Create the Gradient Style
Duplicate the white fill inside the Appearance panel.
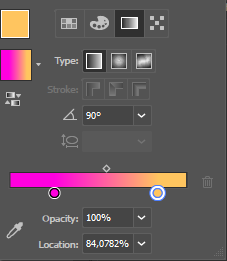
On the duplicated fill, apply a gradient.
Choose colors that blend nicely together — for example, pink to orange for a modern, vibrant look.
Make sure the Angle is set to 90° for a clean vertical gradient.
Step 6: Add a Black Fill for the Outline
Duplicate the gradient fill and change its color to black.
This will become the outline or shadow around your text.
Step 7: Apply Offset Path to the Black Fill
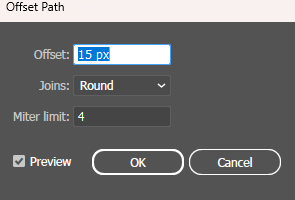
Select the black fill and go to Effect → Path → Offset Path.
Increase the offset slightly to make the outline visible.
Use a value around 15 px for a subtle edge.
Step 8: Add a Transform Effect to the Black Fill
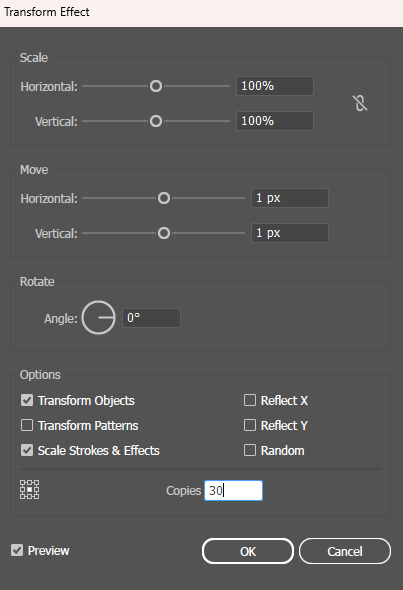
With the black fill still selected, go to Effect → Distort & Transform → Transform.
Adjust the Horizontal and Vertical values slightly (for example, 1 px) and set Copies: 30.
This adds a subtle 3D-like shadow effect.
Make sure Scale Strokes & Effects is checked.
Step 9: Add a Transform Effect to the White Fill
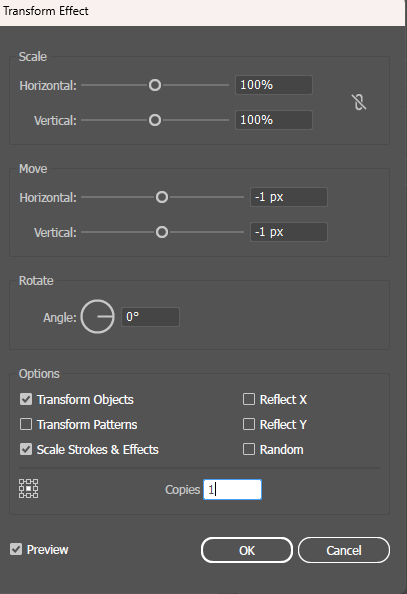
Select the white fill and repeat the process:
Go to Effect → Distort & Transform → Transform.
Set Horizontal and Vertical to -1 px for a reversed offset.
This helps create the illusion of layered depth.
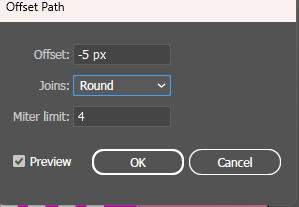
Step 10: Apply Offset Path to the White Fill
Go to Effect → Path → Offset Path again.
Use a small negative value (-5 px) to tighten the gradient edges and enhance the layered look.
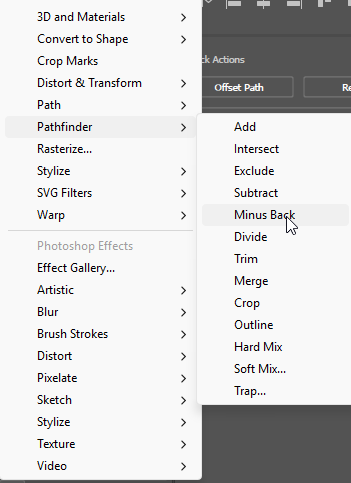
Step 11: Combine Using “Minus Black”
Select the white fill and choose Pathfinder → Minus Black.
This strengthens the contrast and adds extra depth to your gradient text.
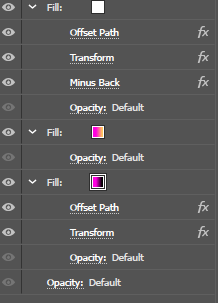
Step 12: Organize the Layer Order
Move the Minus Black layer underneath the Transform layer.
This ensures your gradient stays clean on top, with a solid black outline for balance.
Step 13: Done!
You’ve just created a sleek and modern gradient text effect in Adobe Illustrator.
Experiment with different color combinations, angles, and offset values to find a style that fits your creative vision.
