Illustrator
How to Create a 3D Letter in Adobe Illustrator
Want to learn how to create a bold 3D letter in Adobe Illustrator with a modern, glossy look?
Follow this step-by-step tutorial and discover how to turn a single letter into an eye-catching 3D text effect!
Final Result

From Idea to Final Result
Step 1: Type Your Letter
Open Adobe Illustrator and use the Type Tool (T) to type any letter you like.
Step 2: Add a Base Color
Select your letter and fill it with a medium gray color.
This will serve as the base for your 3D effect.
Step 3: Apply a 3D Effect
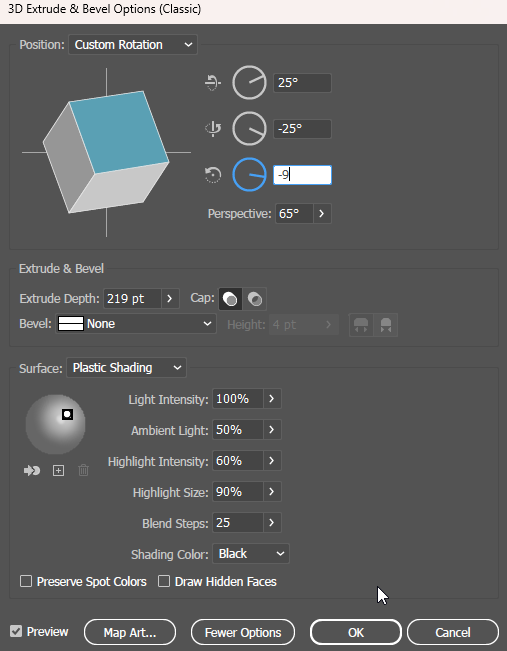
Go to Effect → 3D and Materials → 3D (Classic) → Extrude & Bevel.
This gives your letter its three-dimensional structure.
Step 4: Warp the Text
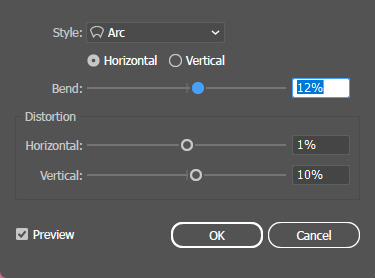
Then go to Effect → Warp → Arc and choose a curve style that complements your design.
This adds a dynamic, flowing look to your letter.
Step 5: Expand the Appearance
Go to Object → Expand Appearance so Illustrator converts the 3D effect into editable shapes.
Step 6: Select the Dark Areas
Use the Direct Selection Tool (A) to select all the darker surfaces of your letter.
Fill them with black or a darker shade to enhance the depth and contrast.

Step 7: Edit the Top Surface
Select the top face of your letter (the gray area).
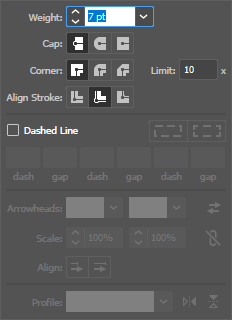
Add a stroke (outline) and adjust its thickness and color as desired.
Step 8: Apply an Offset Path
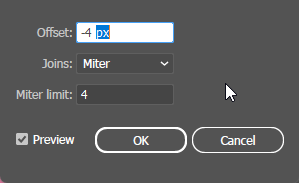
With the top surface still selected, go to Object → Path → Offset Path.
Enter a small offset value to create an extra dimensional edge for your letter.
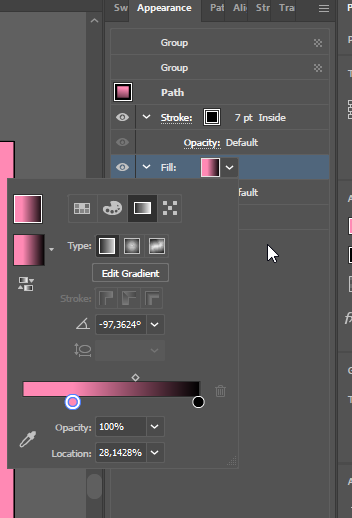
Step 9: Add a Gradient
Replace the gray color with a gradient fill.
For example, try a pink-to-black gradient or any color blend that matches your style.
Step 10: Finishing Touches
Adjust the lighting, angle, and color intensity until your 3D effect looks just right.
Done! You now have a bold, glossy 3D letter design with a modern gradient look.

Tip
Want to add even more depth?
Apply a soft shadow under your letter or experiment with the 3D “Lighting” settings in the Effect panel for realistic highlights.
